Shaun Reed
home-assistant
Recently I’ve taken the dive into running Home Assistant to control all of my smart devices. To start, I did the natural docker thing in the first section below. After a few days I realized this was not going to suit my needs, because I was wanting to use some features of Home Assistant that are not supported by the docker installation method.
My second attempt uses a kernel-based virtual machine, which I’ll expose to my local network using a bridge. Once the KVM is on my local network I’ll assign a static lease to the device in my router’s configuration panel so that the local IP address will always be the same. Finally, I’ll use an nginx server I have in the cloud to reroute requests on home.shaunreed.com to this local IP address. That way I can access home assistant without having to remember the IP address, and because of the static lease for the KVM on my network my nginx configuration will always have the correct local IP for rerouting requests.
Docker Compose
This method of installation does not support add-ons. To use add-ons in home assistant see the KVM installation method.
1 | services: |
Nothing too fancy here. Just put this configuration into a docker-compose.yaml and docker compose up -d in the same directory. If you don’t want add-ons, this will work just fine.
The KVM method looks long and painful, I assure you it’s not that bad.
Kernel-based Virtual Machine
To summarize this method of installation before we get started -
I’ll create a homeassistant KVM running HaOS that is made avaialble on my local network via a network bridge. Next, I’ll use my router’s configuration panel to create a static lease for the new homeassistant device that appears on my network. Finally, I’ll use an nginx server of mine to route requests from home.shaunreed.com to the local IP address I designated in the static lease. That way even though the IP is dead-simple to remember, I can just access home.shaunreed.com while connected to my local network.
Obviously accessing this URL from outside of my network is.. a waste of time. You might get lucky and get some response from a device on your network, but probably not.
These instructions don’t offer much to the KVM newcomer, but here are the official instructions to install HAOS on a KVM -
Official Linux HomeAssistant OS Installation Instructions Using KVM
KVM Host Setup
The bash commands below are really just a way to make these instructions portable, you could also just browse the HaOS releases on github to fetch the file we need.
First we need to find the latest release tag for HaOS.
1 | export TAG=$(curl https://api.github.com/repos/home-assistant/operating-system/releases/latest -s | jq .tag_name -r) |
Now we install the tools needed to manage KVMs. You must reboot after installing this package. It’s possible that your system came with these tools installed, and there will be no need to install them or reboot.
1 | sudo apt install virtinst |
This is the next command in the official documentation. I ran into some errors and work through each of them below.
1 | virt-install --name haos --description "Home Assistant OS" --os-variant=generic --ram=4096 --vcpus=2 --disk $PWD/haos_ova-$TAG.qcow2,bus=scsi --controller type=scsi,model=virtio-scsi --import --graphics none --boot uefi |
If you see this error, you need to reboot after installing virtinst
1 | virt-install --name haos --description "Home Assistant OS" --os-variant=generic --ram=4096 --vcpus=2 --disk $PWD/haos_ova-$TAG.qcow2,bus=scsi --controller type=scsi,model=virtio-scsi --import --graphics none --boot uefi |
Install libvirt-daemon-system to fix this error.
1 | virt-install --name haos --description "Home Assistant OS" --os-variant=generic --ram=4096 --vcpus=2 --disk /home/shaun/homelab/home-assistant/haos_ova-13.2.qcow2,bus=scsi --controller type=scsi,model=virtio-scsi --import --graphics none --boot uefi |
Add your user to the libvirt group by running newgrp libvirt to fix this error.
1 | virt-install --name haos --description "Home Assistant OS" --os-variant=generic --ram=4096 --vcpus=2 --disk /home/shaun/homelab/home-assistant/haos_ova-13.2.qcow2,bus=scsi --controller type=scsi,model=virtio-scsi --import --graphics none --boot uefi |
Almost there!
To fix this error, run sudo -E vim /etc/libvirt/qemu.conf and make the changes shown in the code block below.
1 | virt-install --name haos --description "Home Assistant OS" --os-variant=generic --ram=4096 --vcpus=2 --disk /home/shaun/homelab/home-assistant/haos_ova-13.2.qcow2,bus=scsi --controller type=scsi,model=virtio-scsi --import --graphics none --boot uefi |
These are the changes to fix the last error above. The changes set the user to shaun which allows access to /home/shaun and the group to the default libvirt. There is a lot in this file and these lines will be commented out. Uncomment them and set them accordingly (your username might be different) -
1 | # Some examples of valid values are: |
Restart libvirt service after making the changes above to apply them
1 | sudo systemctl restart libvirtd.service |
At this point the command works for me. See the next section for next steps on how to access the home assistant frontend.
1 | virt-install --name haos --description "Home Assistant OS" --os-variant=generic --ram=4096 --vcpus=2 --disk $PWD/haos_ova-$TAG.qcow2,bus=scsi --controller type=scsi,model=virtio-scsi --import --graphics none --boot uefi |
You do not need to login to this prompt. In the next section we will create a network bridge which exposes this KVM to your local network. Once this is done we can visit the frontend in a web browser and start the home assistant onboarding process.
Network Bridge
Now we need to setup a bridge for our network so our virtual machine will show up on our local network. Once this is done homeassistant will show up on your wifi router’s list of devices with it’s own local IP address. You can visit this local address 192.168.143.123:8123 to see the home assistant application from any device while connected to your network.
Note that any IP address found in this post is fake, and yours will be different.
Here are two good resources that helped me here
Before we make any changes, let’s check the current connects and devices using nmcli
Show current connections
1 | nmcli con show |
Show devices and their status
1 | nmcli device |
Now, we need to create a bridge that will connect to our current ethernet connection enp1s0 from the list above -
1 | nmcli con add type bridge ifname br0 |
The bridge is now in the list of connections but it is not yet active
1 | nmcli con show |
Now make the connection from our ethernet device enp1s0 to the br0 bridge so that the KVM we host using the bridge network will appear on our local network. This is a slave connection that will always start with the bridge connection so that we are always tied to our ethernet.
1 | nmcli con add type bridge-slave ifname enp1s0 master br0 |
Now bring up the bridge and the slave connection
1 | nmcli con up bridge-br0 |
Both should be assigned a device in the output below
1 | nmcli con show |
Check device to see the status of the bridge connection is good. Here, we are waiting to connect. This can take some time so give it a few minutes.
1 | nmcli device |
Check device status again and see that the connection is good. Note enp1s0 is now connected to bridge-slave-enp1s0 under CONNECTION column.
1 | nmcli device |
Sometimes it can take a couple of minutes to connect if you have been toying around a lot, so give it a bit and check devices again if it says it’s still trying to connect or something to that effect.
If you want this to be the default connection from now on you should enable autoconnect -
1 | nmcli device set br0 autoconnect yes |
KVM Host Configuration
Now we just need to tell our KVM host to use thet bridge network we just created. To do this we first need to define the network in virt-manager so if you haven’t already..
1 | sudo apt install virt-manager |
List networks currently available to virt-manager -
1 | virsh net-list --all |
Define the bridge using a new XML file in any directory as temporary input to virsh net-define -
1 | vim br0.xml |
Define the network using the temporary XML file we just created
1 | virsh net-define br0.xml |
Start the network, and then set it to automatically start on reboot
1 | virsh net-start br0 |
We should now see the bridge in the list of networks
1 | virsh net-list --all |
Now open virt-manager, if you see a permisssions denied error connecting to libvirt socket then just reboot after installing virt-manager.
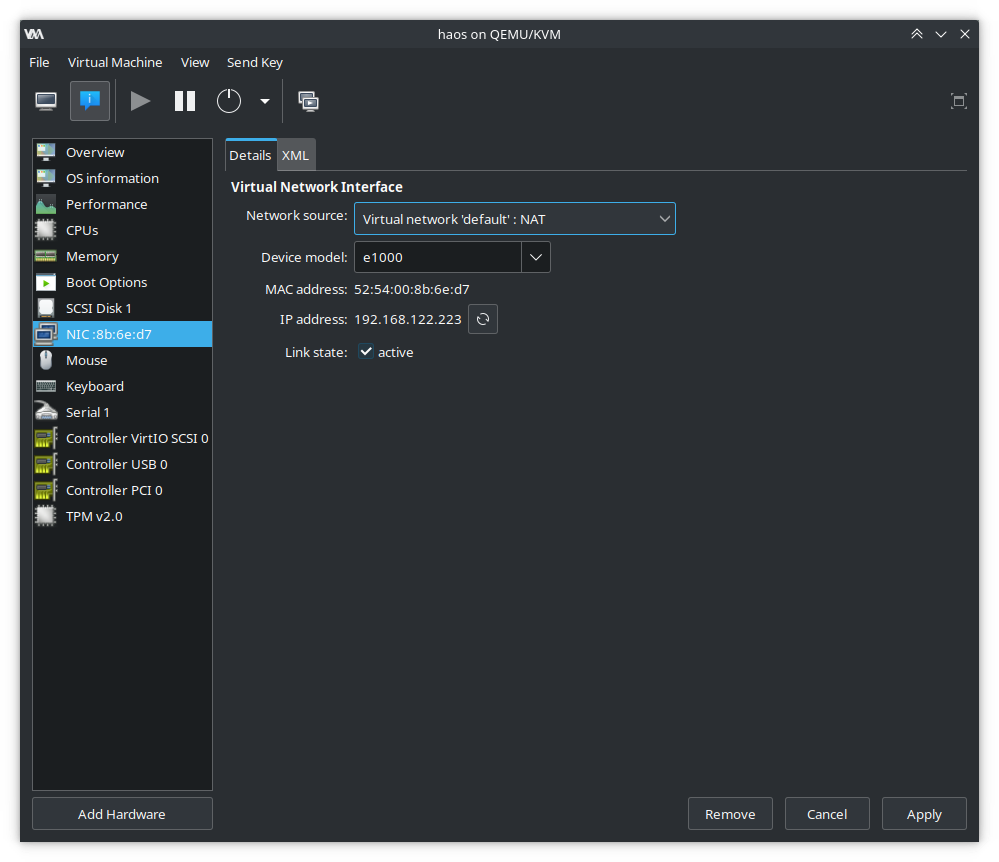
Navigate to your host’s details panel and under NIC, select the bridge network -
Change the Network source to use br0, note that the IP address may now appear as Unknown -
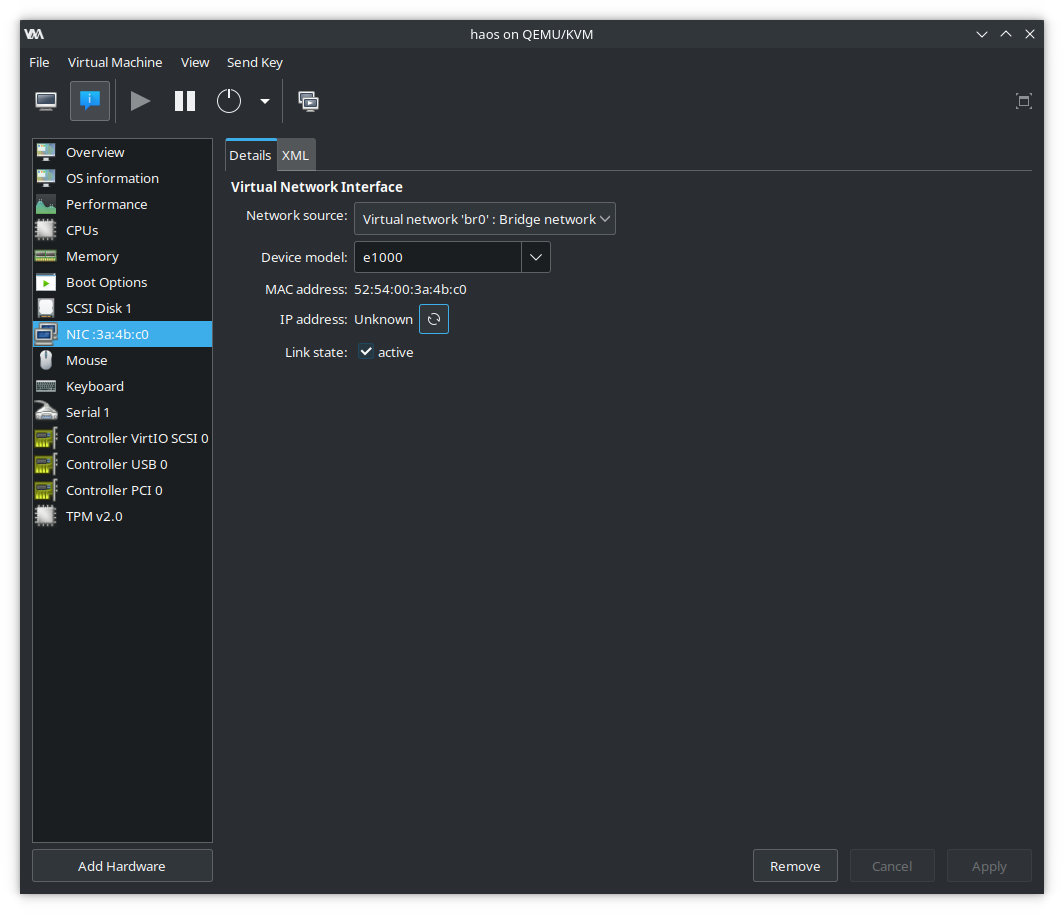
Restart the KVM and you should now see the virtual machine listed in your router’s devices.

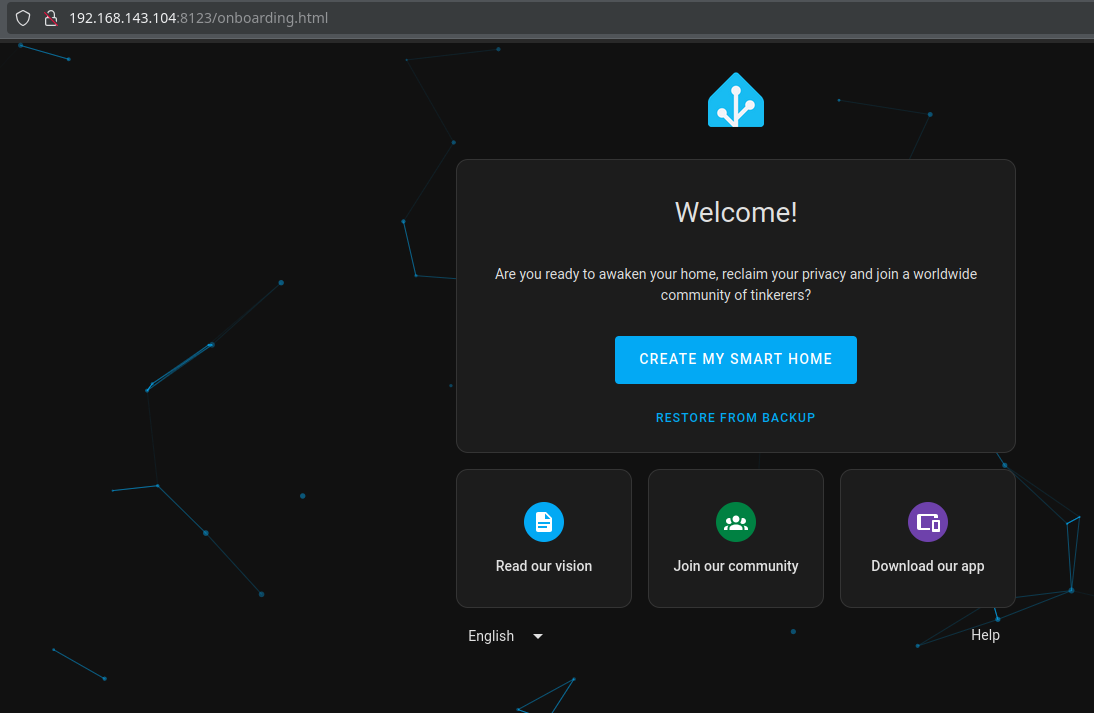
Using the IP in the screenshot above from my router’s configuration panel, I can now visit 192.168.143.104:8123 in a web browser to start Home Assistant OS on boarding.
For me this means I can assign a static lease so that I know home assistant’s local IP address at all times and it will never change. You can usually do this in your router’s configuration panel.
Once this is done, I implement an nginx hack on one of my cloud servers to direct requests to the local IP address assigned in the static lease. Here I used the rewrite nginx command to replace the request address with the local IP for home assistant.
1 | # This exact configuration is not actually in use anywhere on the cloud. |